
APP WALKTHROUGH / IPHONE + ANDROID / PRO
Build an MGRS
route card.
Turn four coordinates into an ordered plan with true bearings and distances. Check the result, then carry a text or image copy. You can complete this exercise at a desk without starting navigation.
Before you start
Saved waypoint lists and route cards require Pro. The free app still includes the full 10-digit MGRS display and one active destination. You can read this walkthrough and use the MGRS exercises without buying anything. Compare the existing Free and Pro options.
Use the English interface to match the button names below. The same shared workflow is available on iPhone and Android; system share and photo-permission screens differ.
This is a desk exercise. The coordinates below reproduce the published Washington, DC example. They are not directions, an approved walking route or permission to enter land. Leave NAV and CHECK & START ROUTE unused while practicing.
STEP 01
Create a practice list
- Open LISTS.
- Choose + NEW, enter
DESK PRACTICE, then select CREATE. - Confirm that the new list is selected. If a loading or saving error appears, resolve it before adding points.
Pro supports up to 10 lists with 20 points per list. If you have reached a limit, use an existing practice list only if changing it will not disturb a real plan.
STEP 02
Add four complete grids
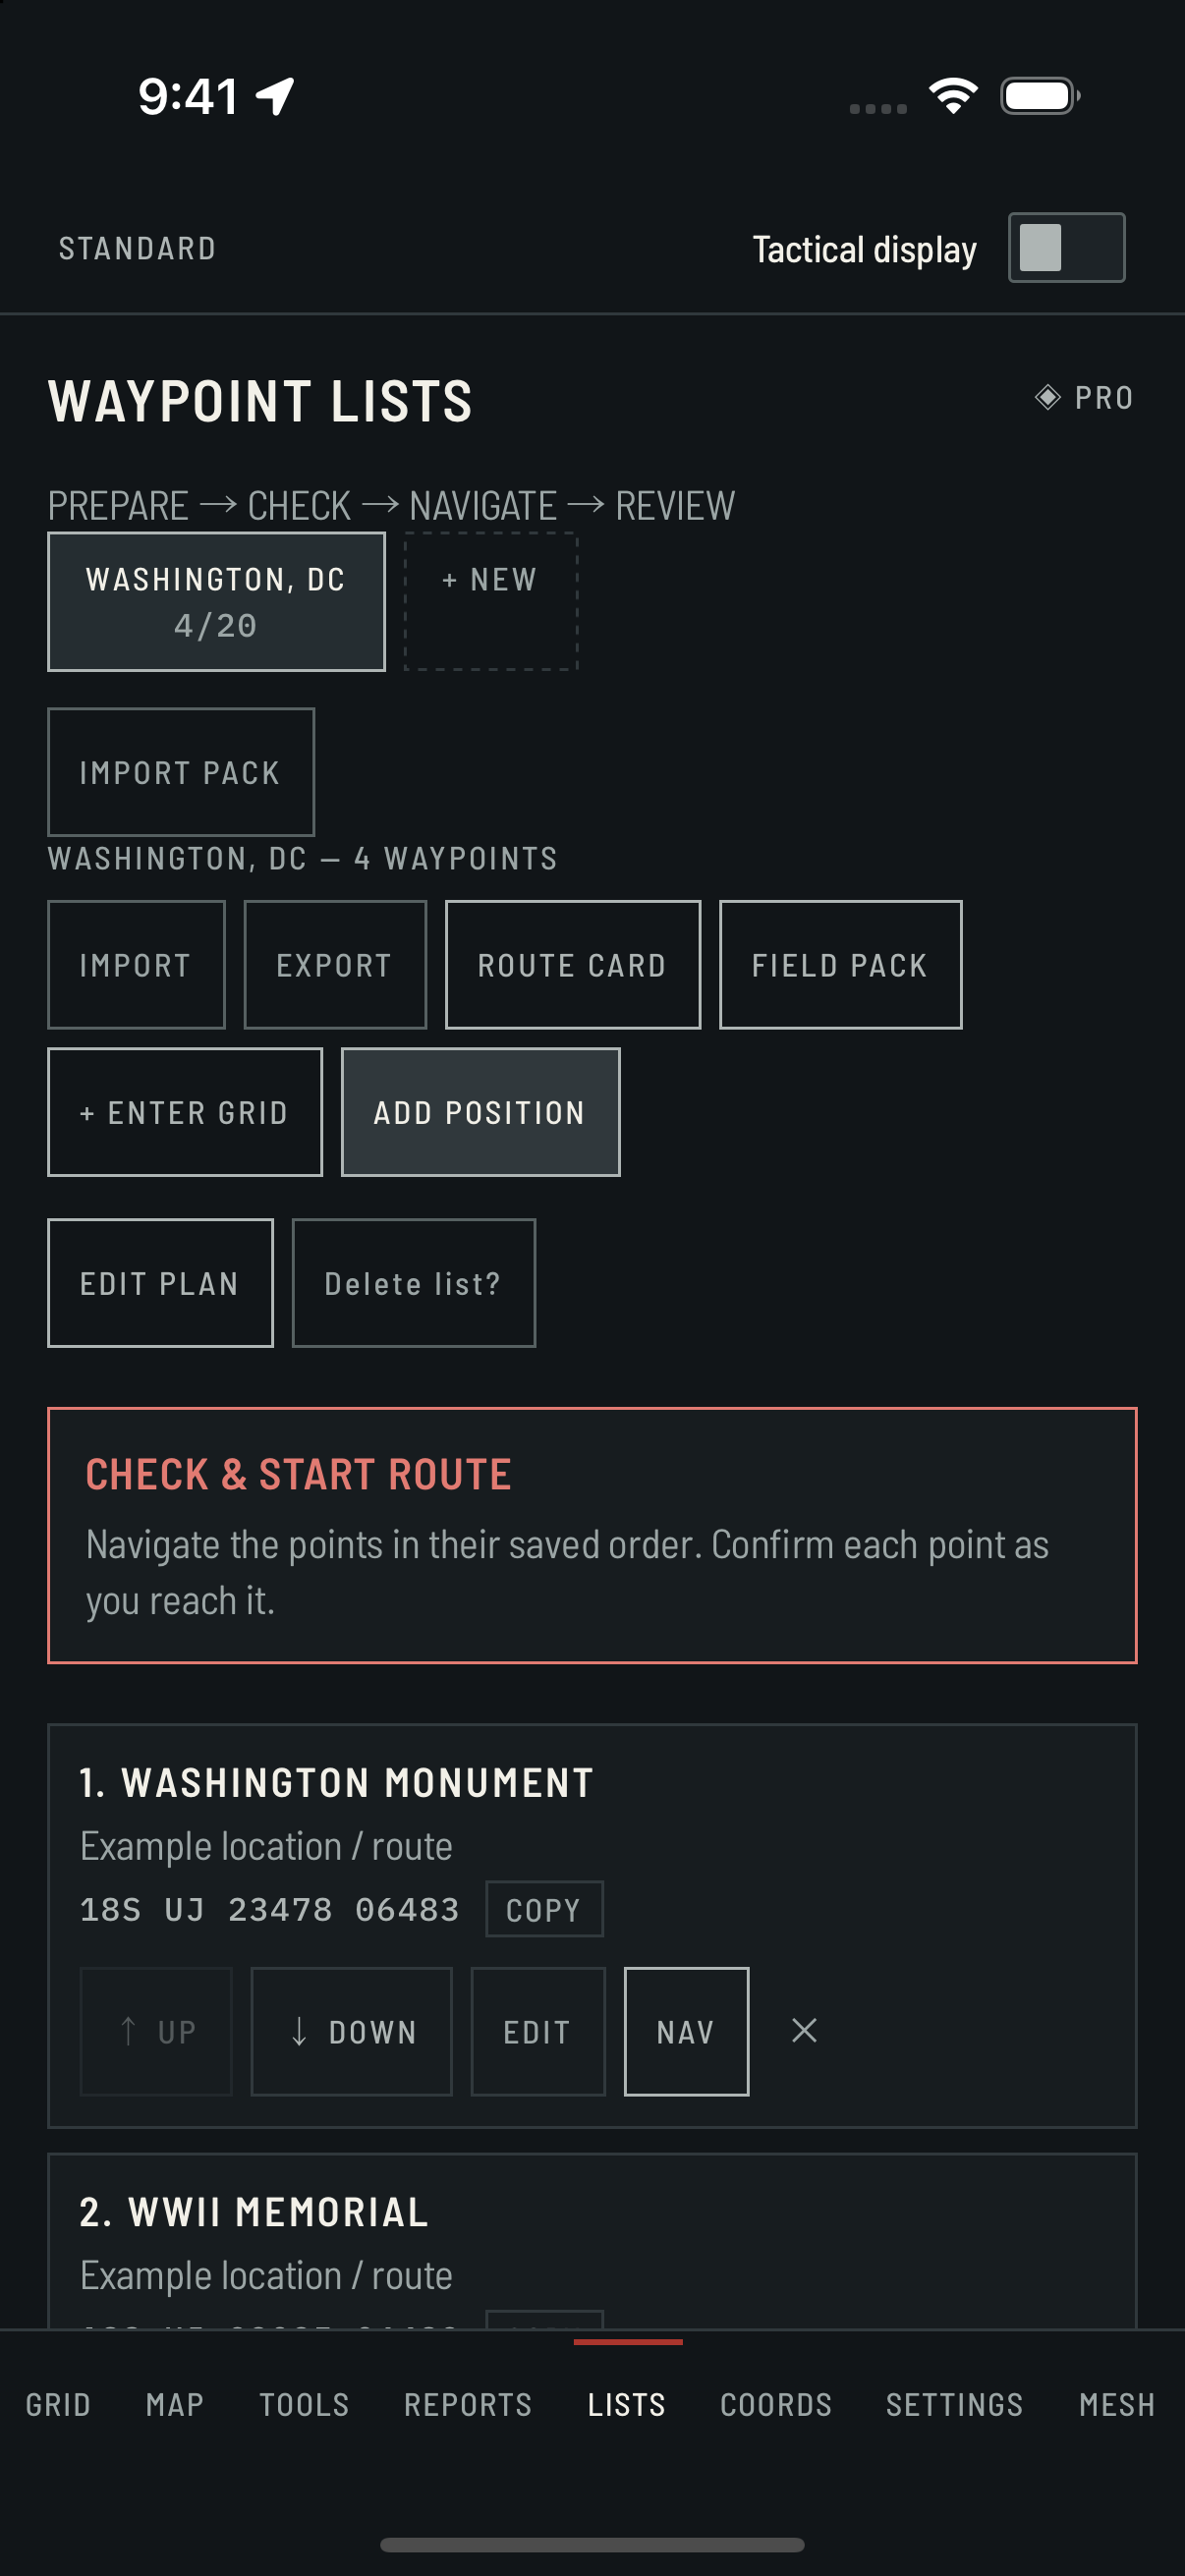
For each row, choose + ENTER GRID, enter the complete MGRS coordinate and the short label, then select ADD. Wait for the point to appear in the list before adding the next one. Keep the leading zero in each northing.
| Order | Label | MGRS |
|---|---|---|
| 1 | MONUMENT | 18S UJ 23478 06483 |
| 2 | WWII MEMORIAL | 18S UJ 23035 06482 |
| 3 | LINCOLN | 18S UJ 22185 06490 |
| 4 | JEFFERSON | 18S UJ 23354 05587 |
Here S is the MGRS latitude band, not a southern-hemisphere flag. Spaces help readability; include the zone, square letters and both numeric halves. Review how to read a complete grid.
If a coordinate is rejected, check the full string against the table rather than guessing missing digits. The manual-entry examples do not require a live GPS fix. ADD POSITION is a different action: it records your current GPS position instead.
STEP 03
Check the saved order
Read back all four labels and coordinates. Use UP or DOWN on a point if needed; the saved order determines the card's legs. Use EDIT to correct a point, then SAVE.
Optionally choose EDIT PLAN, enter a planned pace of 20 minutes per kilometer and a note such as Desk practice only, then SAVE. Leave the optional planned start blank for this exercise. The resulting time is an estimate from distance and pace, not a terrain-aware arrival promise.
STEP 04
Read the route card
Choose ROUTE CARD. Four points produce three connecting legs; the first point is the start, not an extra leg. For the example coordinates and order above, the displayed result should be:
| Leg | True bearing | Distance |
|---|---|---|
| MONUMENT → WWII MEMORIAL | 269°T | 443 m |
| WWII MEMORIAL → LINCOLN | 269°T | 850 m |
| LINCOLN → JEFFERSON | 126°T | 1.5 km |
Total: 3 legs, 2.8 km displayed. The calculation before display rounding is about 2.770 km, so a pace of 20 min/km displays about 55 min. Adding the already-rounded leg labels can give a slightly different total.
°T means true north. Do not treat it as a magnetic-compass or grid-north bearing. The card calculates straight lines between saved points; it does not find a walkable path, account for obstacles, or prove that you traveled it.
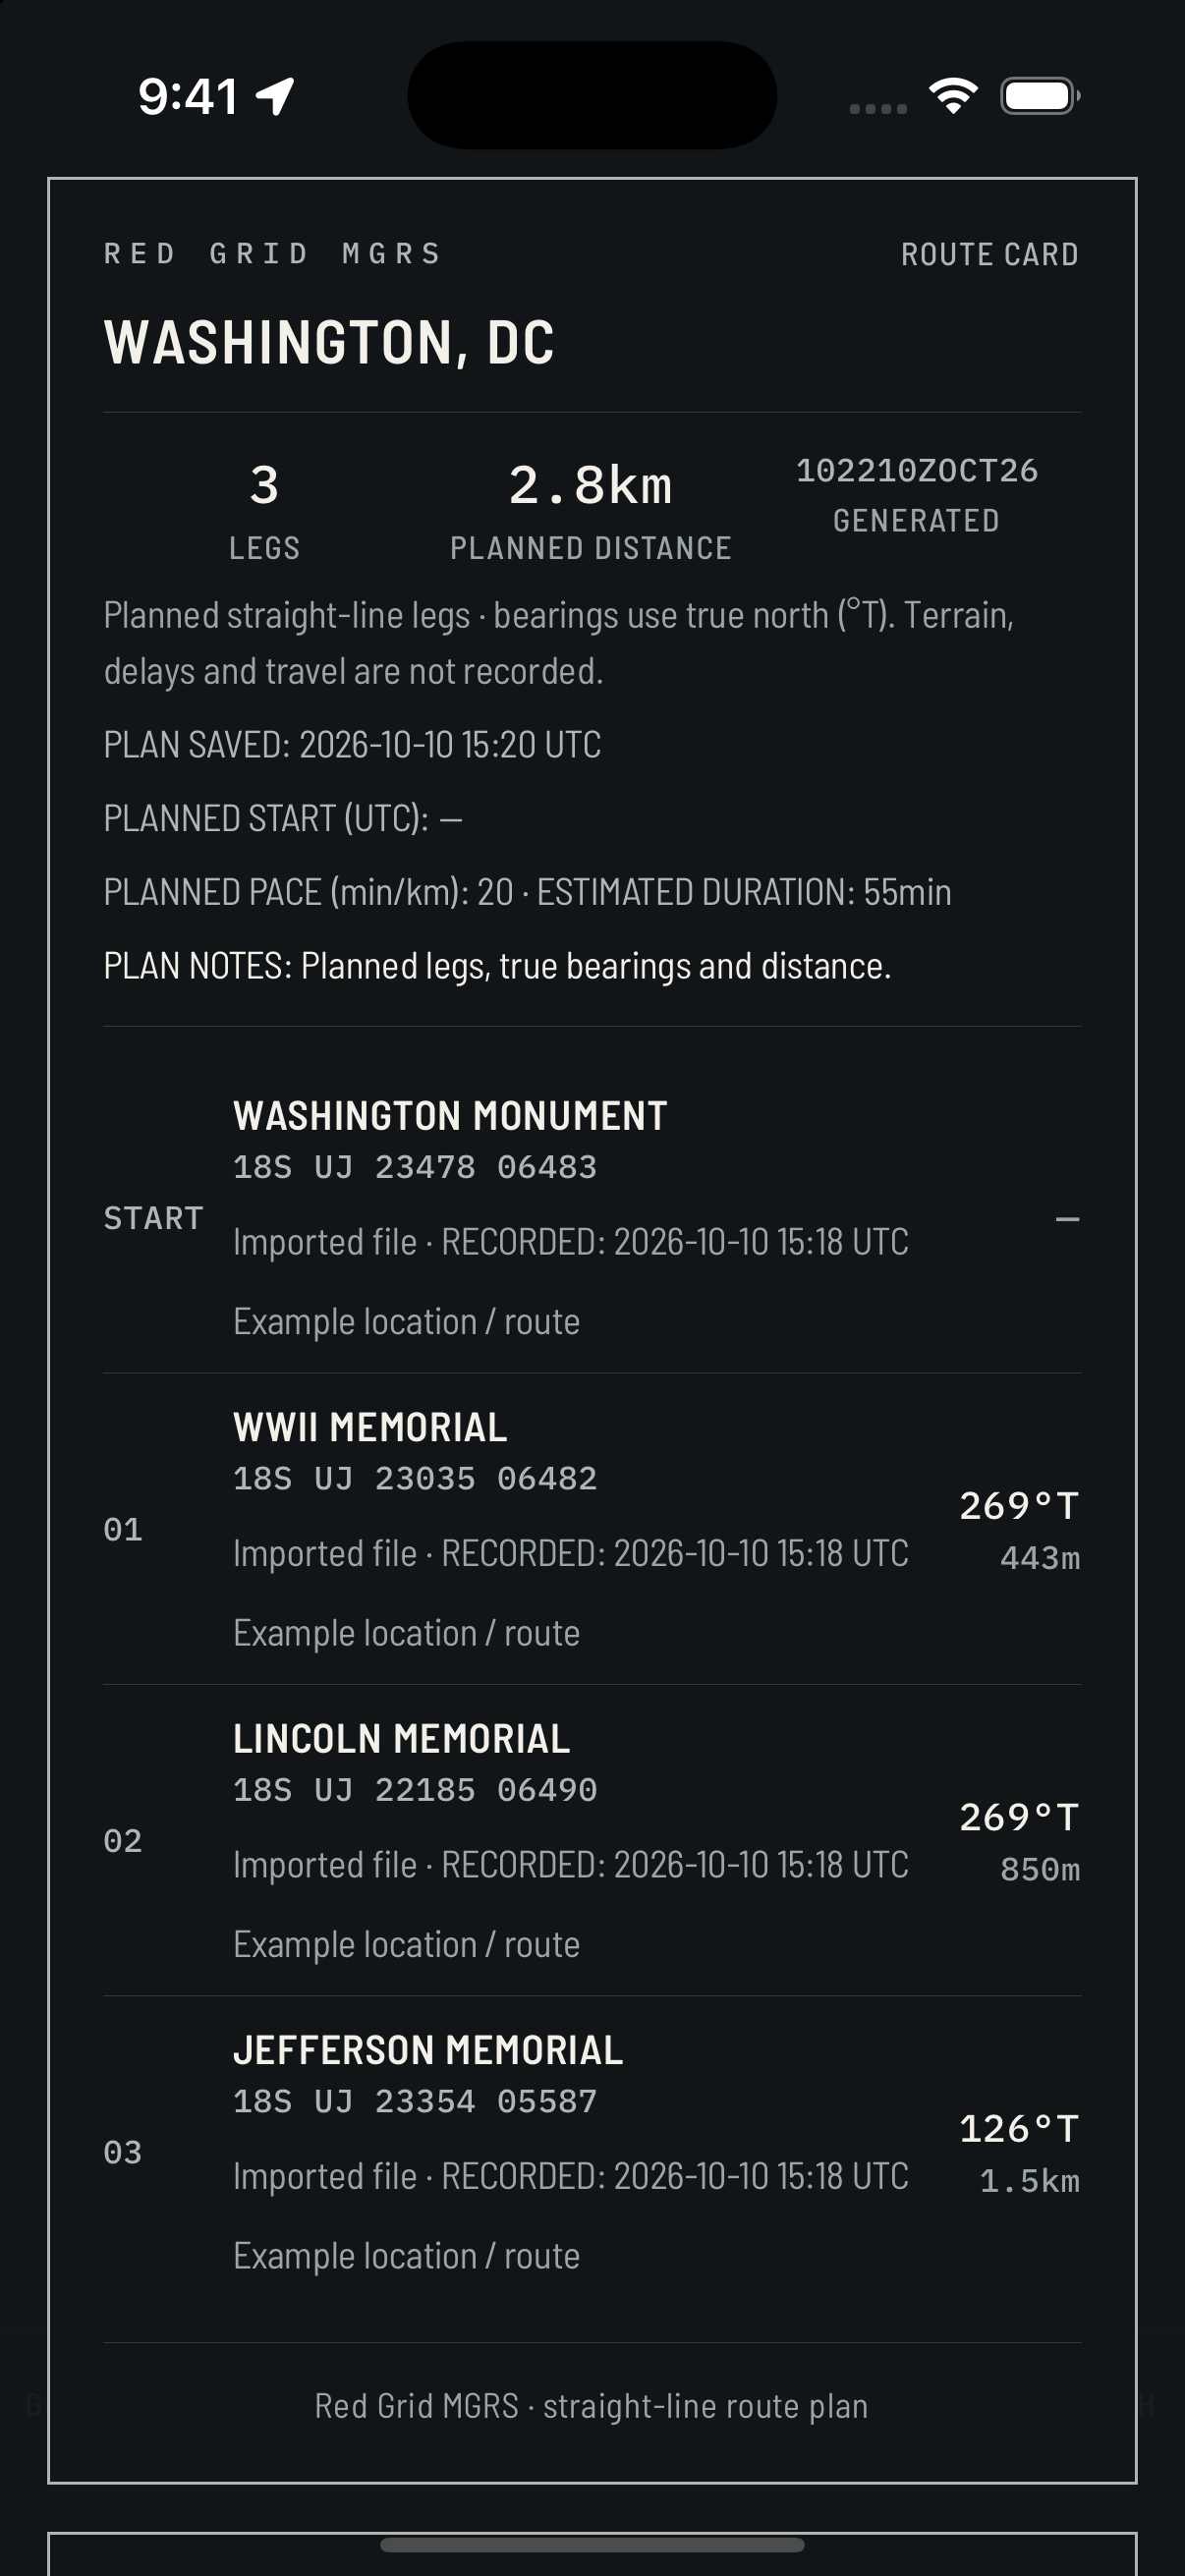
See the Android example
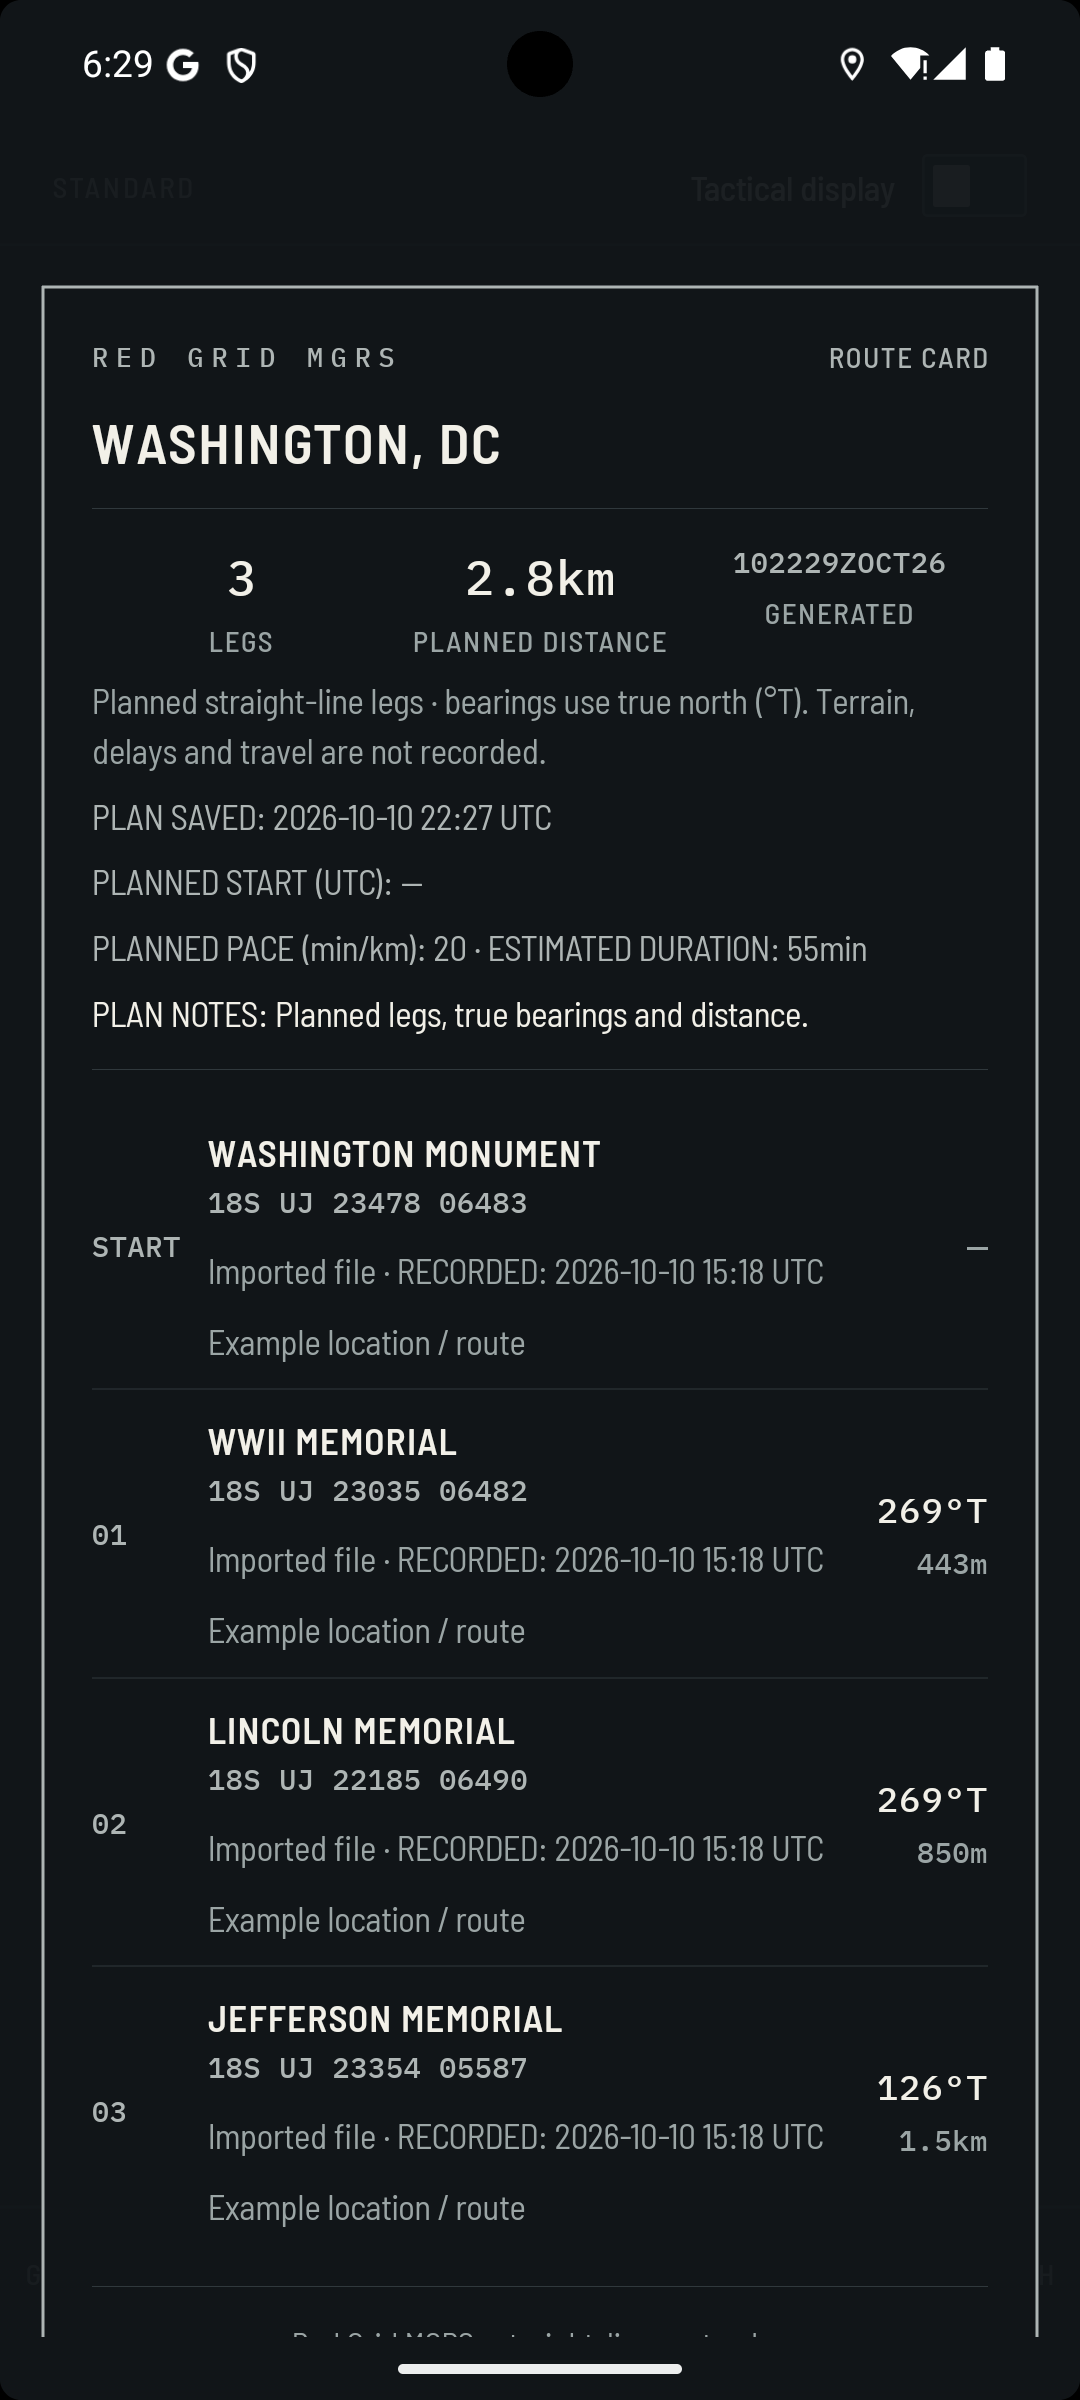
Your points should be marked as manually entered; the older screenshots say Imported file. The generated time changes when the card is opened. Those differences are expected.
STEP 05
Keep a usable copy
- COPY TEXT CARD: copy the plan, then paste it into a note or document you control. Check the full list and the final leg after pasting.
- SAVE IMAGE: allow photo-library access if you want the image saved. Wait for the saved message, then open the image in Photos or your gallery and check that it is complete and readable.
- SHARE CARD: open the system share sheet. Choose a destination deliberately and verify the resulting file there. Opening the sheet alone does not mean anything was saved or delivered.
For waypoint data rather than a card image, close the card, choose EXPORT in the list and select GPX or KML. Complete the system save/share step, then open the exported file in a compatible tool and check the coordinates. Receiving apps may handle route order and metadata differently.
Photo permissions, image capture and sharing availability depend on the device. If image saving is unavailable, try COPY TEXT CARD. The app does not automatically upload this plan; any sharing destination you choose has its own behavior.
You're done when these checks pass
- The practice list reopens with all four saved points in the intended order.
- The card shows three legs and the expected bearings and displayed total.
- Your chosen text or image copy opens outside the card and includes the final point.
- You can explain the difference between grid precision, GPS accuracy and a straight-line route plan.
Before a real outing: independently check coordinates, terrain, access, weather and your north reference. Prepare and inspect map coverage separately; a route card contains no map tiles. Carry an independent navigation reference. Use the offline preparation checklist.
Practice reading MGRS · Get the printable reference · Open the free converter
Screens and scope
Prepared by Red Grid Tactical. Instructions checked against the released 4.1.6 app's list, route-card and export implementation on . The screenshots are genuine earlier 4.1.0 captures, with their capture versions labeled; they do not show a new release or a new field test.
The example is educational. It demonstrates plan preparation and checking an output, not a completed journey, surveyed accuracy or government endorsement.